This is one of the paper pins we made on Monday night at my "Paper Porcelain Pin" making class. See my entire tutorial on making these pins here. I'll be publishing the date of this class (I'm going to do it again) soon. You can see from the side view (shown left) that I made a second wing in 3 layers of Riding Hood Red paper and then adhered it with a Dimensional. The face ... View Post
Archives for October 2008
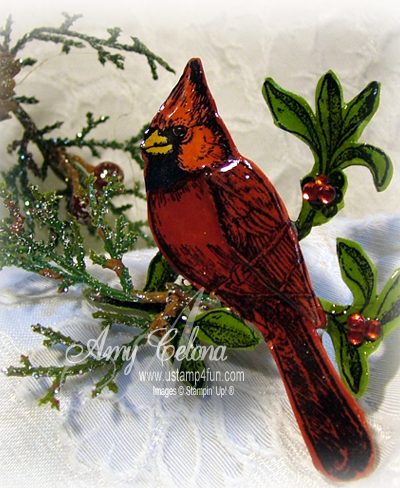
‘A Cardinal Christmas’ card
Okay, so this is my *new* favorite Christmas stamp set... I love birds! See below for card cutting dimensions... I colored the cardinal in with watercolor crayons that I didn't actually color with... what I mean is that I like to use the open set as a 'palette' and take the colors that I need. Less color is better... the artwork is done for you... just use the suggestion of ... View Post

Crazy for Cupcakes Gift Card holder
This is one of the birthday sets that is 20% off this month for Stampin' Up!'s birthday sale! I let the DSP Bella Rose determine the color of the stamped images (I had a bunch of scraps left over from cards I was making). It's a *very* simple gift card holder to make and it took a VERY small amount of the designer series paper... in fact, I used the wide grosgrain to hide the fact that ... View Post
Home for Christmas
What a fabulous stamp set... and I LOVE the Designer Series paper "Ski Slope" (which is the background 'stars' as well as the 1 1/2 inch decorated stripe that I cut off of an elaborate stripe pattern paper. You can see the pop up details below: paper saving trick: I learned this trick working in a stamp store years ago. The stamp companies sell you samples for display, ... View Post
Eat, Drink and Be Scary Halloween Treat Bag
Isn't the candy in this bag awesome?! I got it at the local Giant supermarket, it is chocolate shaped like body parts (my favorite is the eyeballs)! The Top Note Sizzix die has a 'stitched' border about 1/8 in inside that I cut off for the orange DSP so that you can see the black layer a 'matted' look. Materials List ... View Post
Harvest Home Thanksgiving Card
Love that "Top Note" die cut for my new Sizzix machine!!! The 'stitching' look is on the die cut... it comes out that way. The pumpkin image was stamped in StazOn black and colored in with Earth Elements watercolor crayons and an Aquapainter. The fabulous Designer Series plaid paper in the background is from the 'Manchester' collection (awesome plaids!). Okay, so are ... View Post
House of Haunts again!
This is the original "House of Haunts" card meant for my last month's Stamp-a-Stack of Stuff... but the previous post ended up being the card we did. It uses the same supplies but the haunted house is stamped on the Eggplant cardstock. Be sure to sign up for my Stamp a Stack of Stuff for this Thursday evening (repeating Friday morning), register through my online Calendar. So, ... View Post
House of Haunts…
This spooky card's 'moon' was made by using a 1 1/4 inch circle punched bond paper 'mask' and sponging first More Mustard and then Elegant Eggplant. The 'tombstones' are the tag punch and then I used the corner rounder on one to make the old fashioned 'rounded top' with corners. House of Haunts Card Set(s): ... View Post
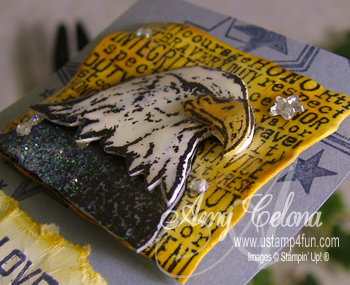
Eagle ‘Paper Pin’
Okay, here is another teaser for you. My class on October 25th (see my Calendar) will feature holiday pins (or if you don't want to make it a pin, you can make it a magnet or leave as an embellishment). This set "Free & the Brave" is awesome... I love the Eagle, it's demeanor says 'don't mess with me.' You can view a Paper Pin Tutorial here and also download a step-by-step Paper Pin ... View Post
Porcelain Paper Pins!
Its been a long time since I've had the time to make these wonderful pins... AND just in time for the holidays I am offering a class on October 27th (see my calendar). I needed an 'over the top' idea and pulled out my old samples and found a "Kelli Purkey Paper Pin"!!! I actually met her in person and watched her teach a spontaneous class (literally sitting at a table, cranking these pins ... View Post