 I seriously LOVE this bird! The set is the new ‘Beautiful Season’ (W #122680, C # 122682) from the 2011-12 Idea Book & Catalog but I do love birds anyway.
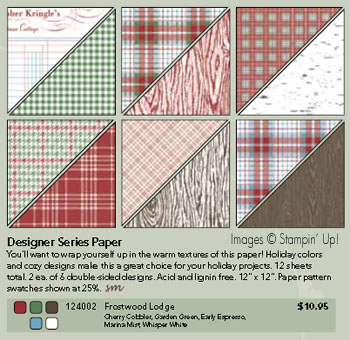
The awesome paper is ‘Frostwood Lodge’ from the Holiday Mini Catalog. I was able to use the three different large plaids to make 108 of these cards. The magic of it is that I am using only 2 inches by 4 inches of the designer paper on the front.
The Eboneezer method to making a holiday card (i.e., maximizing the materials). The ‘white’ layer in the background (on top of the card) is 2 1/2 x 4 inches of white cardstock pressed with Finial press Sizzix embossing folder. It adds texture and, even better, I can get 8 of this size layer from one piece of cardstock with minimal waste.
And, as I said before, the plaid paper cut at 2 x 4, you get 18 per 12 x 12 sheet. If you are doing the math, that leaves a space of about 1/2 inch between the top layer and the bottom one and I covered it with the 5/8th inch satin ribbon. Aren’t I just SO resourceful?!
Oh, and did I mention, these are my Founder’s Circle swap.


Lovely card…….! Wish I was going to Founder’s Circle!
This card is so lovely! and I get one! i can’t wait!
This card is beautiful! I am so thrilled that I will get one! yipppee!
So gorgeous! Wish I were going. This would make a great masculine Christmas card. Thank you.
Ter 😉
beautiful & wish I was a lucky gal to be going to Founders; I know you’ll have a great time
This is gorgeous!! I haven’t gotten that stamp set yet, but you’re definitely making me want it now that I see it in action!! 🙂
Amy!
I saw this gorgeous card at Linda Heller’s stampcation last weekend!!! Every demonstrator that spoke to me over the weekend was led to the board near the fireplace where Linda posted your beautiful card!!! Please do tell me how you made the bird so gorgeous!!! whisper white paper? did you stamp it 2 times, once with sahara sand, then the black and the color??? I’m dying to learn how you accomplished this coloring technique…please share if you don’t mind!!! Linda Heller attended Founder’s also, and she brought back alot of cards, but yours was my favorite!!! From the heart, thank you for creating such a beautiful piece! Like you, I love birds too!!! Please email me! Terri Tosh
I’m a brand new demo and my first workshop hostess/guests want to work on Christmas cards. I was going to do this card for my workshop. I cut out the papers, but do you just wrap the ribbon around on the card or do you have a separate layer base that is adheared to the card front. That is how I made my sample so no exposed ribbon ends show, but I’m also trying to be thrifty since I only have supplies from my starter kit. This is a beautiful card you made. I can’t tell from the picture. Please email me. Thanks so much, newbie Kelli
Okay, you have met the queen of cheap!! For this card, I cut the ribbon slightly longer than across the front. If you put monoadhesive behind the ribbon, especially where you cut the ends (flush with the edge of the card), it will hold the ribbon fibers together after you cut. So in answer to your question, the ribbon is one 4 1/4 inch piece across the front of the card and the knot is another small piece of ribbon tied in a knot and attached separately.